Units of Measure (UoM) are the standardized units by which you quantify your inventory - pounds, kilograms, liters, ounces, pieces, boxes, etc. The ability to track multiple units of measure gives you the most granular look into your inventory control - how much of the product is in stock, ordered from a vendor, or promised to customers. But above all, it saves you from the headaches coming from the need to convert from one UoM to another. We’re thrilled to announce that the UoM functionality for HandiFox Online is out. And we are even more excited to tell you all about it.
UoM Settings
To see the default UoM, edit or add new ones, head straight to Settings->Units of Measure. By clicking on it, you’ll be redirected to two tabs:
- The Units of Measure tab shows some of the universally accepted UoM and allows editing or adding custom units - something more unique to how you purchase, stock, or sell inventory (pairs, dozens, packages, etc)

- The Units of Measure Preset tab allows creating sets of conditions for converting from one UoM to another on purchase, sales, transfer, and manufacturing transactions.
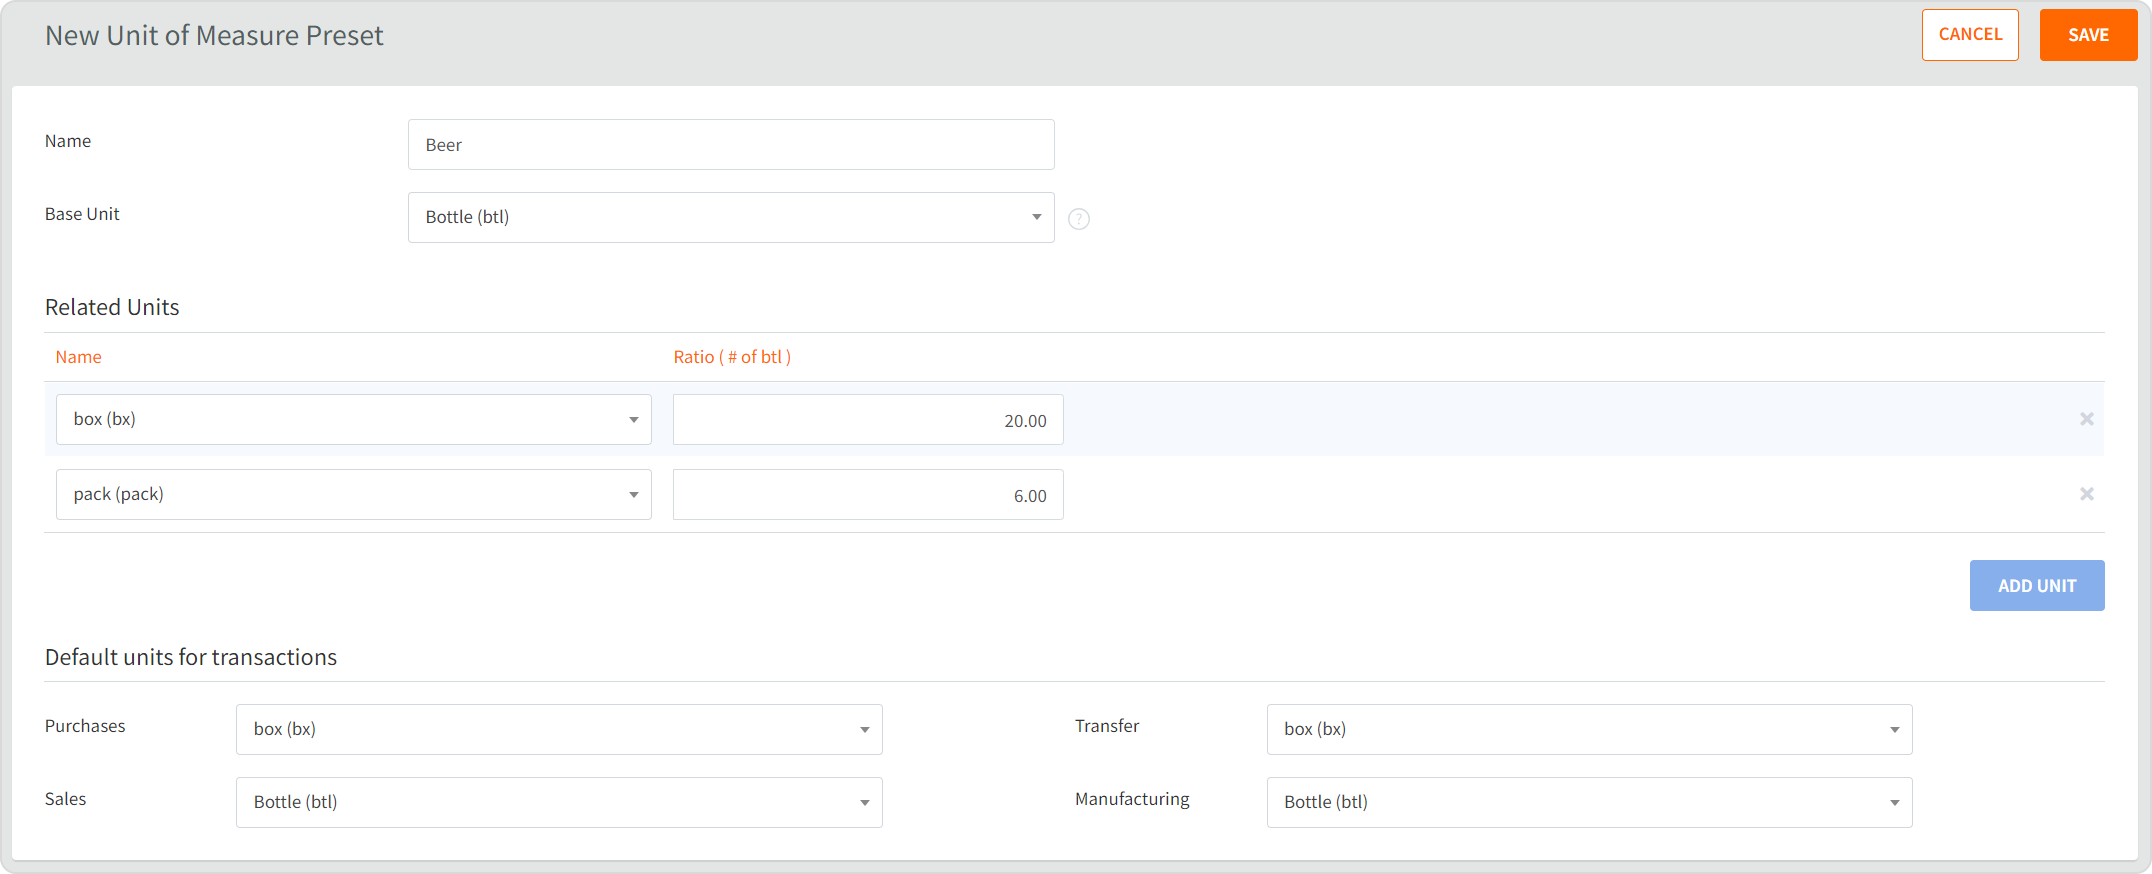
This example suggests that you quantify beer in bottles, packs, and boxes. The Default units for transactions allow you to lock specific UoM for this chosen item on purchase, sales, transfer, and manufacturing transactions. According to the screenshot above, beer is purchased and transferred in boxes, but manufactured and sold in bottles.
These presets can later be used for a quicker entry of the UoM information while filling out a product’s card.
Defining UoM for items in the web
.To set up UoM for items, you’ll have to go to an item’s profile. The interface of an item card has been updated and now contains three tabs: Salesinfo, Purchase info, and Units of Measure & Barcodes.
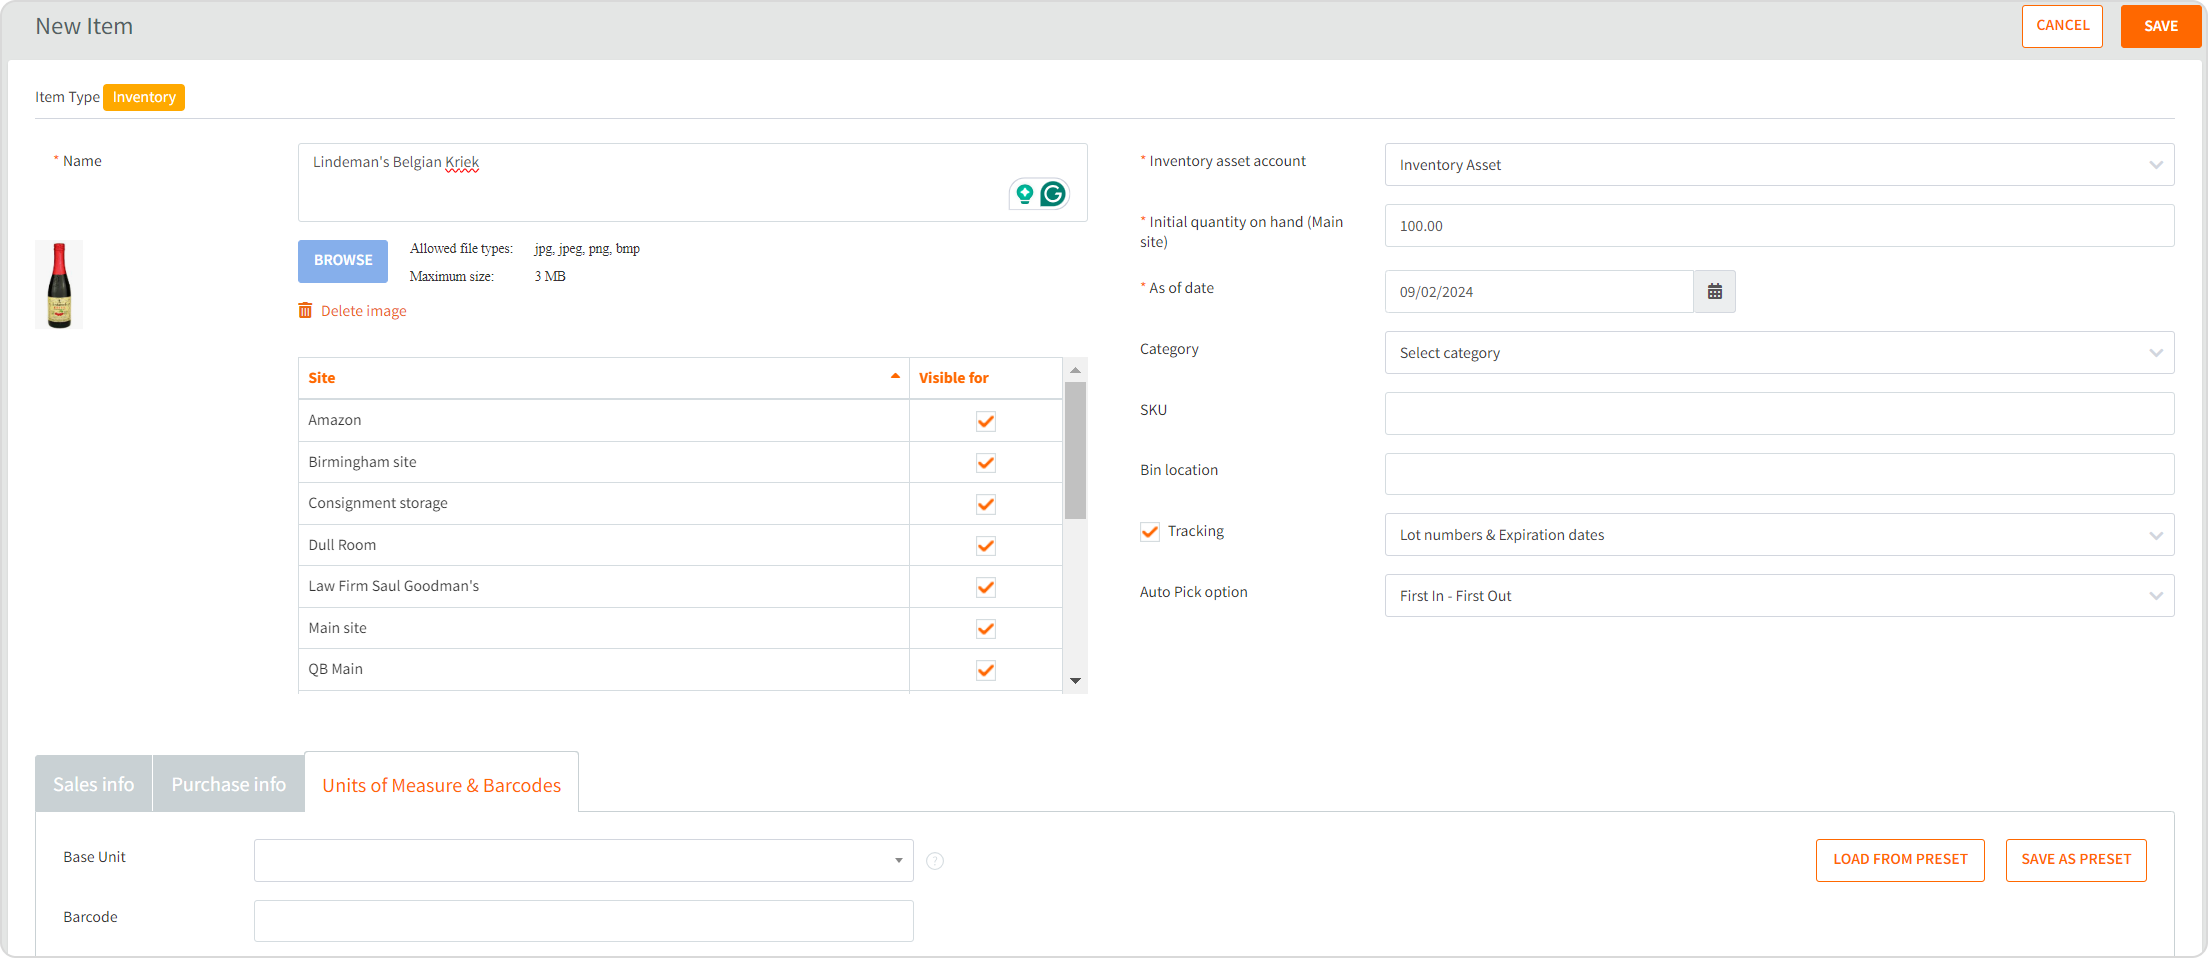
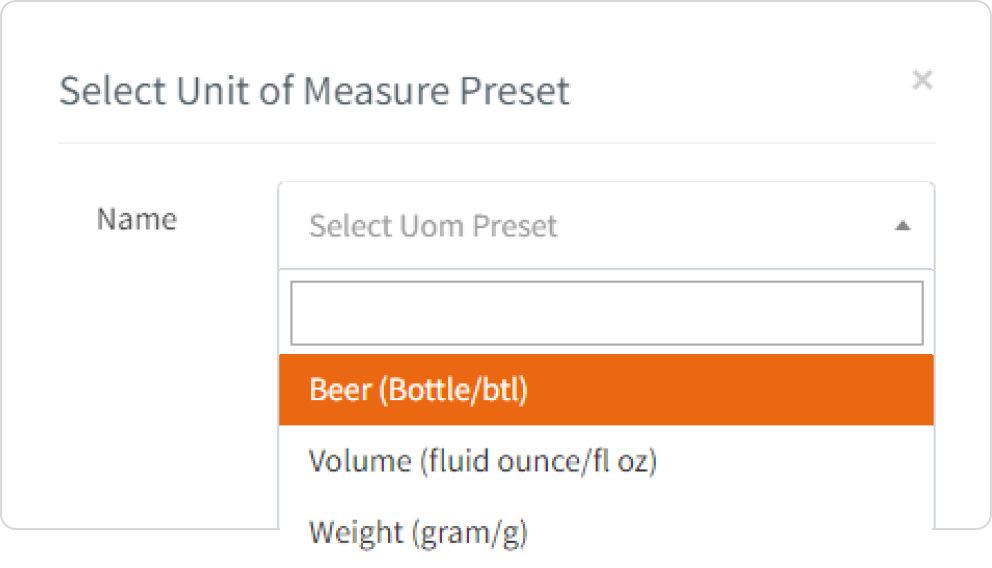
In the third tab, you can set up Base Unit, which is the default unit of measure for tracking this item. Related units are additional UoM that are in use in your business. You can set up to 10 additional UoM for one item and define their conversion rates by filling out the Ratio field. To minimize manual work, you can load this data from the presets you created earlier (see the screenshot with a “Beer” preset in UoM Settings). Make sure you add barcodes here.
Here is a possible scenario. You might be selling beer in bottles or six-packs, but purchasing them in boxes while stocking in packs or bottles. Your base UoM would be each, the purchase UoM would be boxes (=20ea), and the sales UoM - each or packs (=6 ea).
Units of Measure in QuickBooks Online
QuickBooks Online doesn’t have UoM. It always shows items in the base unit, irrespective of how HandiFox sees and counts them per your settings. Transactions created in QuickBooks and pushed to HandiFox Online will also show items in their base unit there. But you’re free to edit these transactions by converting or changing the items’ UoM in HandiFox Online.
Setting up UoM through the mobile app
In both iOS and Android apps, you can set up and change UoM while creating a new item or editing an existing one. Turn to the Units of Measure & Barcodes tab to set the Base Unit, Related Units, and Default Units. There is also a quicker option of loading these from the presets you created in the web app earlier.
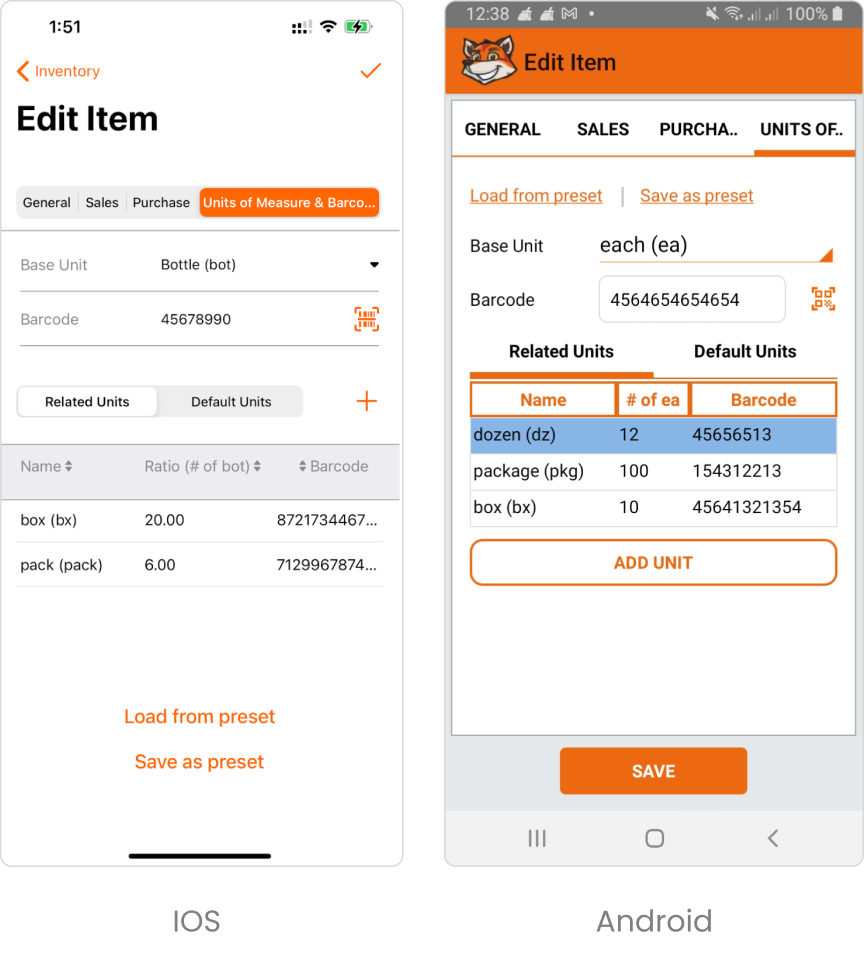
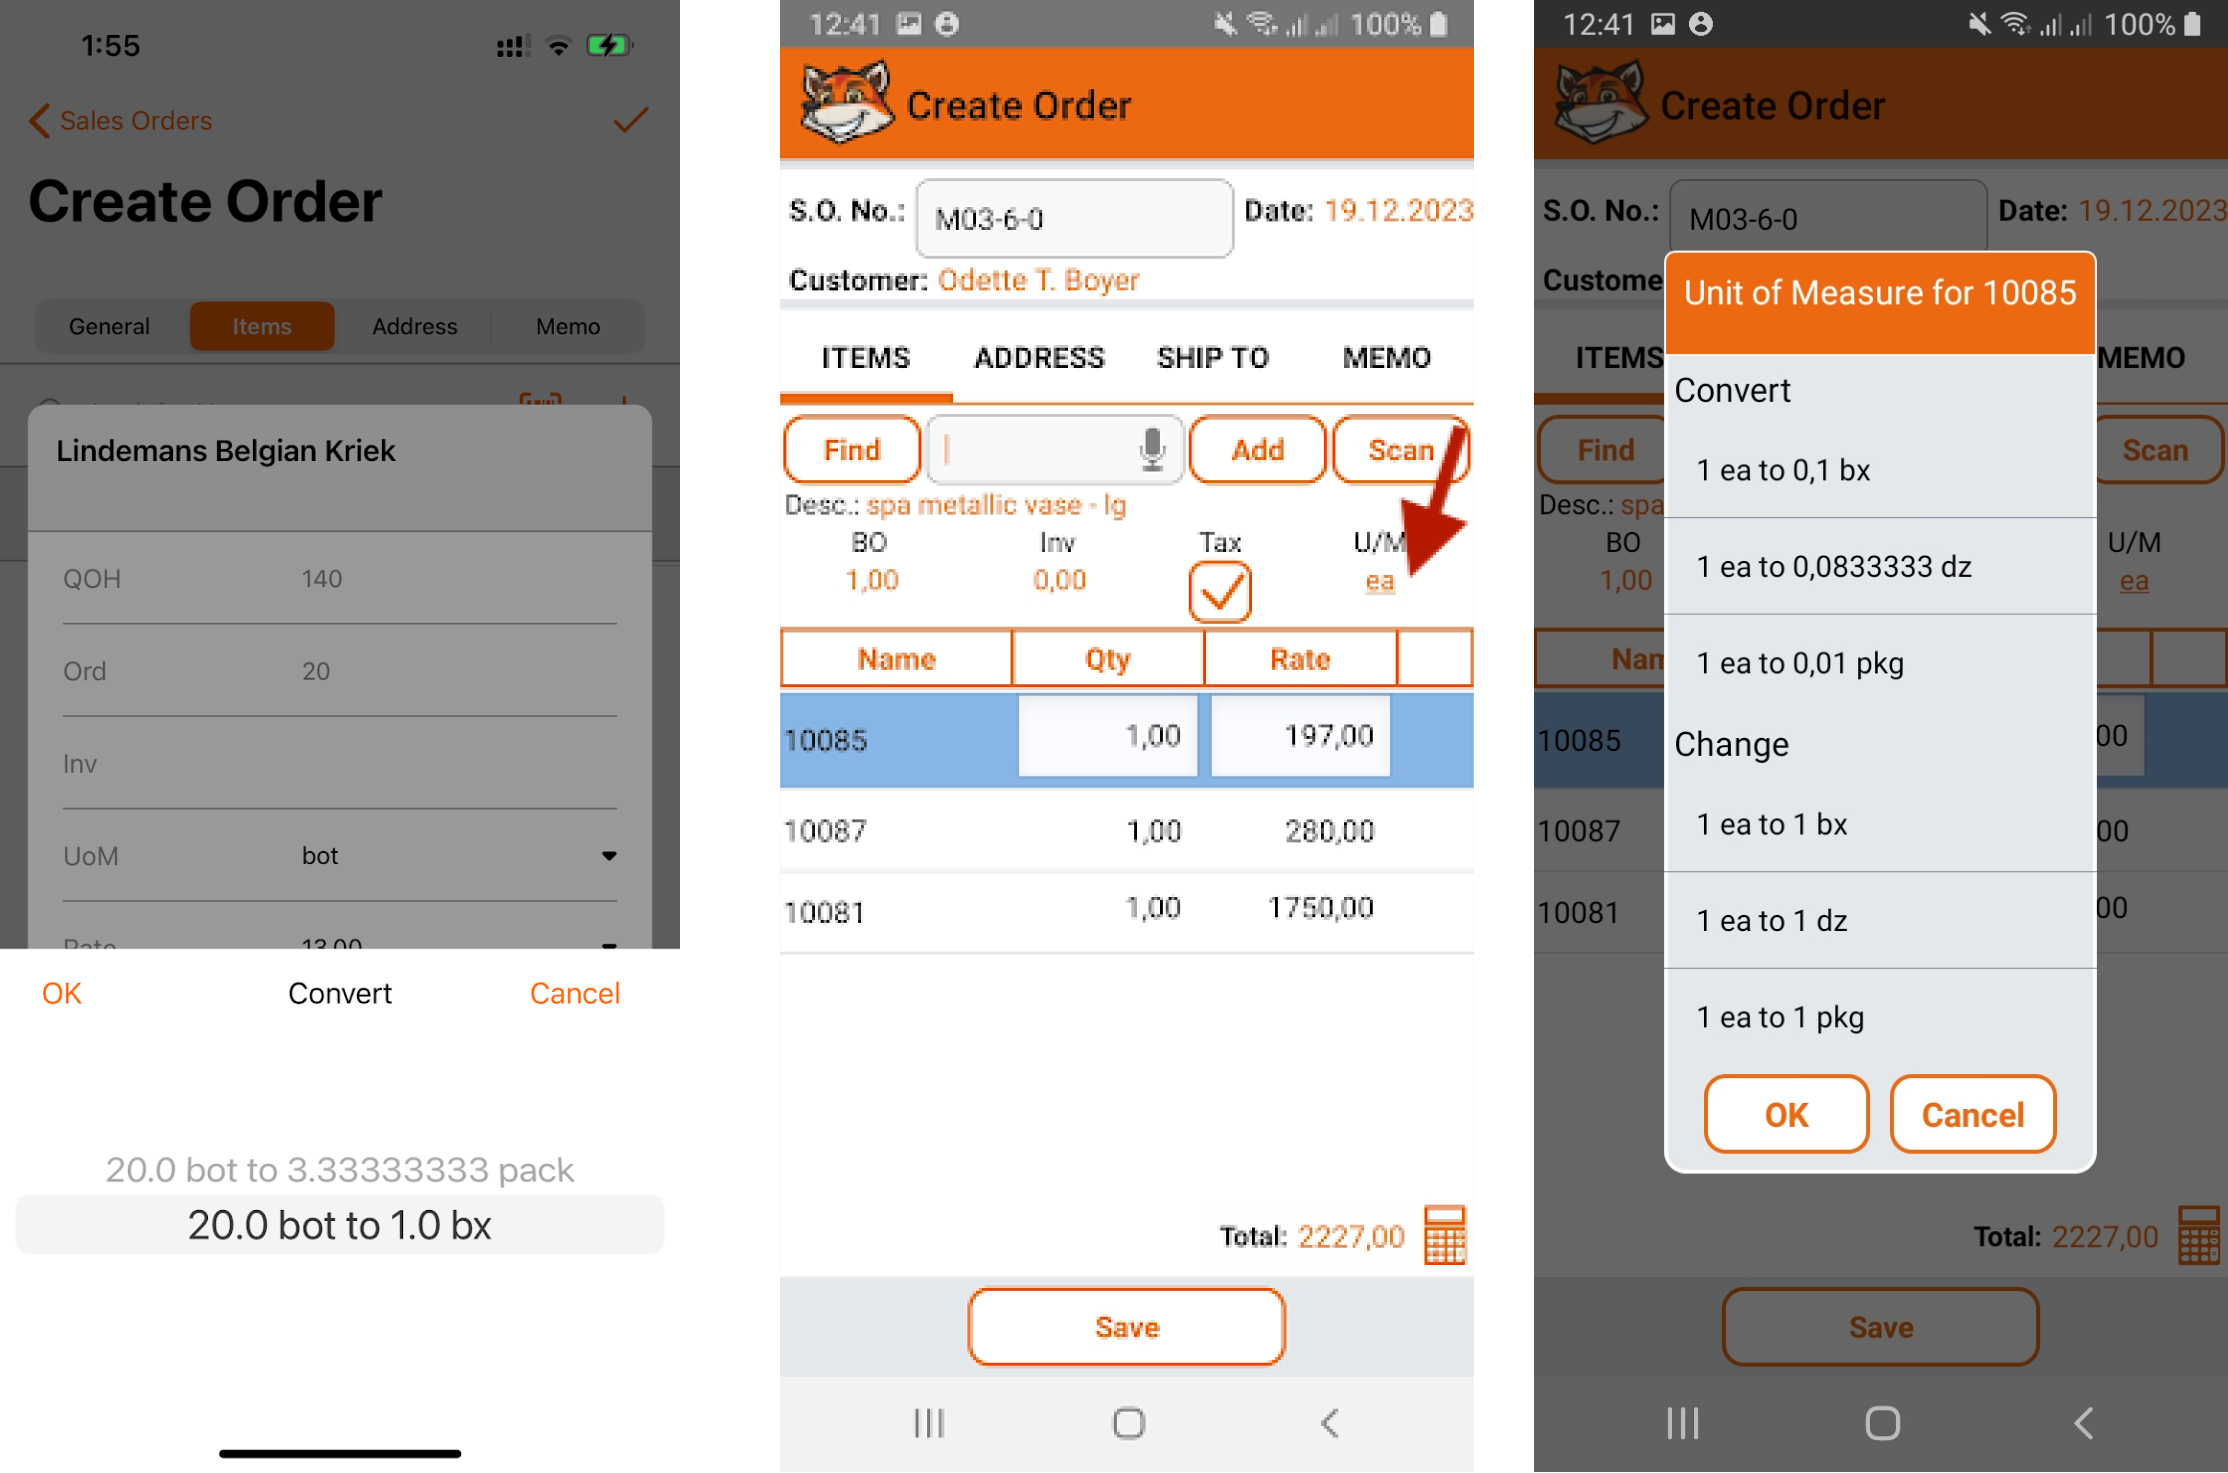
While creating a purchase or sales transaction, you can only convert UoM but not change them, unlike in the web app. To do it in the iOS app, tap on an item, then its UoM and choose how you want to convert. In the Android app, tap on the link under U/M.
Mass-importing items with different UoM (for HandiFox Online Standalone only)
If you’re using the Standalone version of HandiFox Online, you can batch-import items using the sample file generated by HandiFox. You can find it after clicking the Import button on the Item List page.
The two rightmost columns of the table in the sample file contain UoM information. By filling them out and uploading the file to HandiFox, you save a lot of time on the UoM set-up.

Purchasing and selling in a different UoM
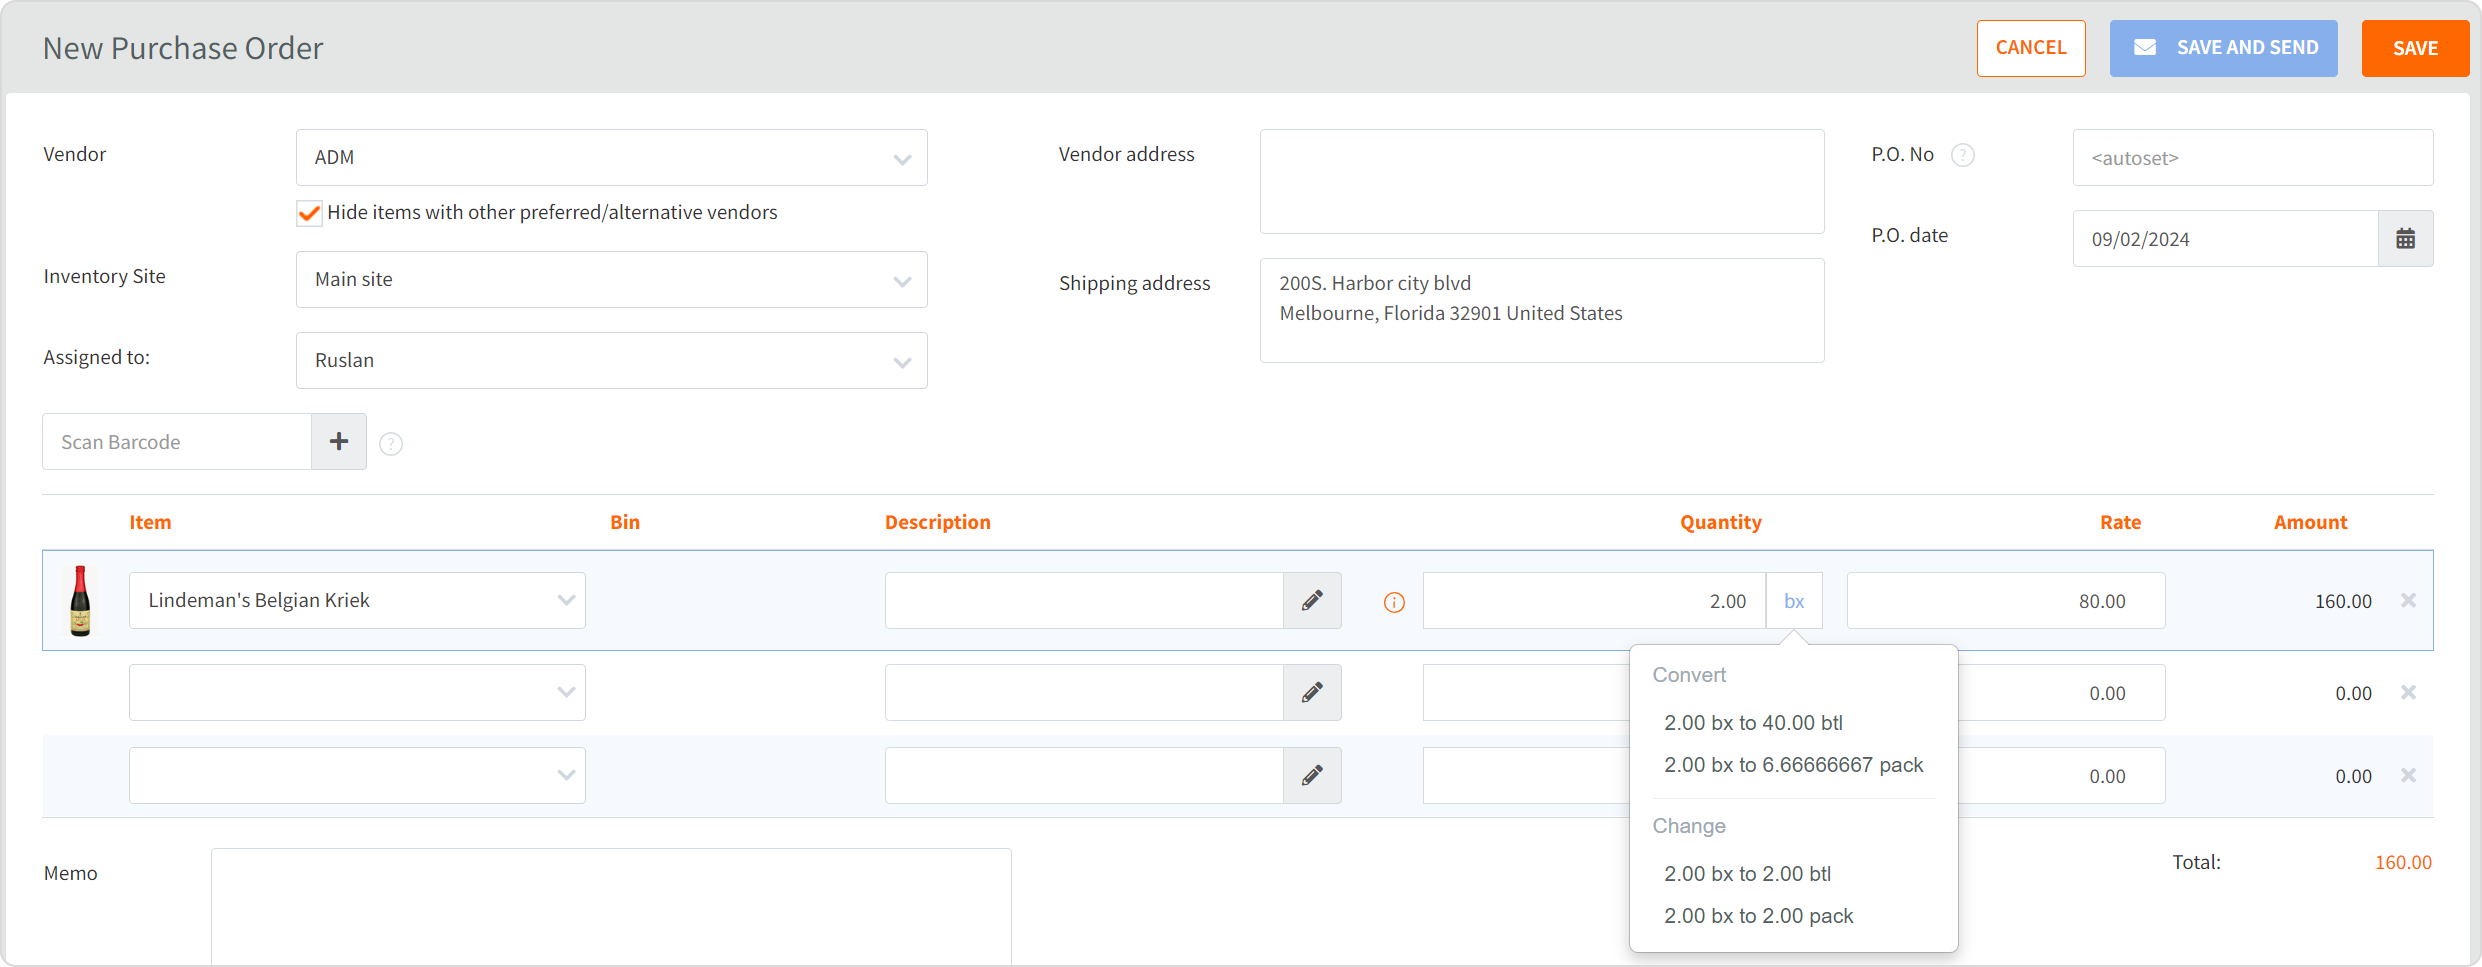
HandiFox offers the flexibility of purchasing and selling items in any UoM. If you’ve set up the default purchase UoM, that’s the one you will see on all PO transactions with this item. However, you can always change it while filling out a PO, SO, or Invoice. Click on the UoM abbreviation next to quantity and choose either to convert or change its UoM.
Note!
Purchase Orders and Invoices that QuickBooks Online received from HandiFox will contain items in their base UoM as opposed to the UoM they were assigned to in HandiFox.
UoM during stock intake and counting
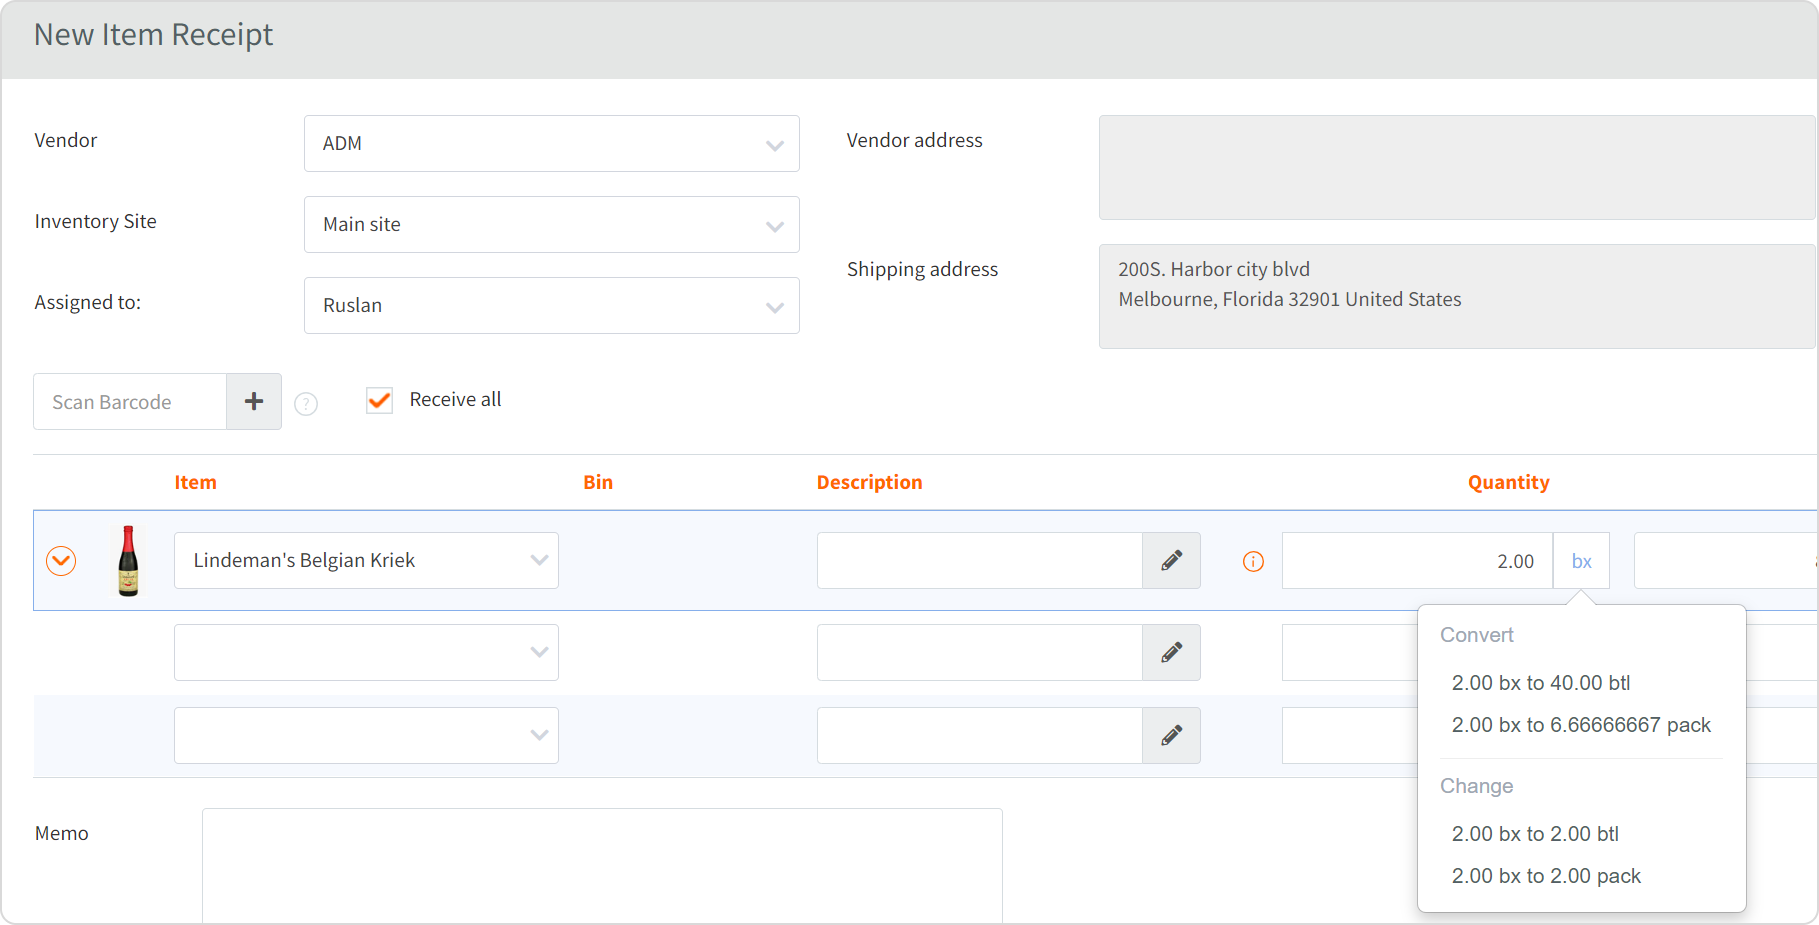
While receiving stock, you can also convert or change UoM. If you ordered 2 boxes (=40 bottles), feel free to scan each bottle individually - the software will do the conversion and count them in boxes or whatever UoM makes more sense at the time.
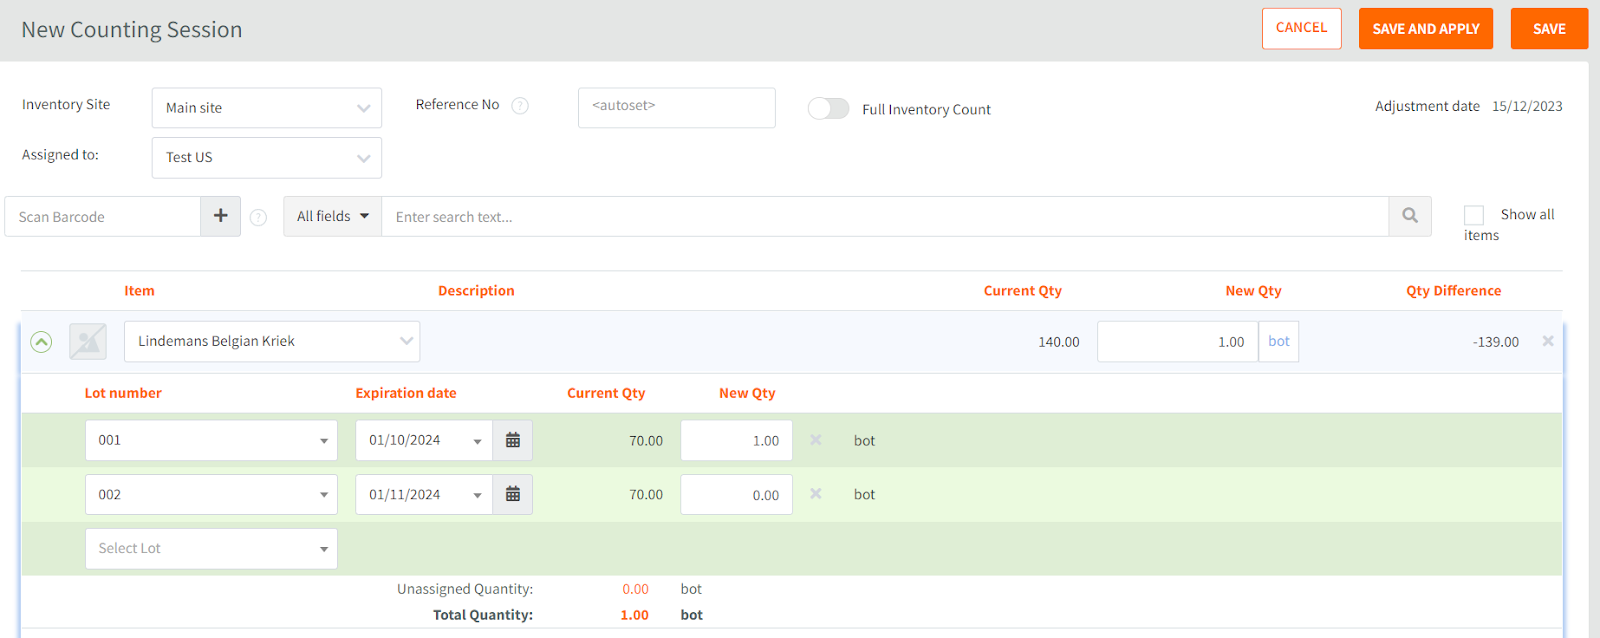
During counting sessions, HandiFox will show items only in their base UoM.
Other changes concerning the UoM functionality
1. Check the QOH Viewer - you will see the UoM abbreviations next to an item’s quantity.

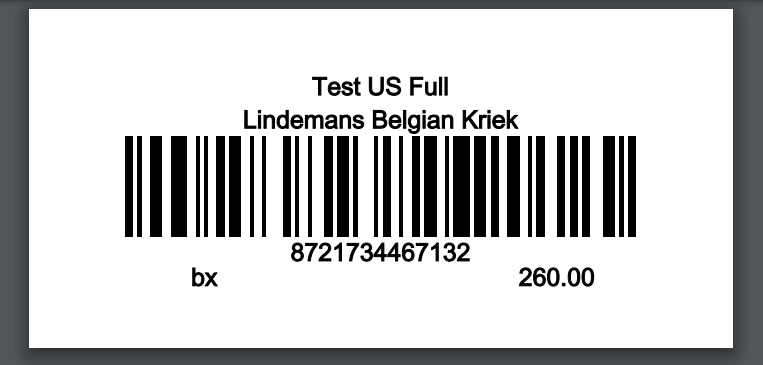
2. You can add the UoM information to barcode labels for printing. Go to Barcodes, locate the item, then put a tick against it, and click
3. All reports will show items in their base UoM.

HandiFox Online can help you effortlessly tie multiple UoM to your products and use the right one in the right context. Give it a go now by checking the updates in your inventory app. If you haven’t tried HandiFox before, don’t hesitate to take a free 14-day trial.


.svg)


