Recently, we’ve delivered a handful of updates to further improve your experience working with the different parts of HandiFox Online. Make sure you give these a try.
Printing QR-codes
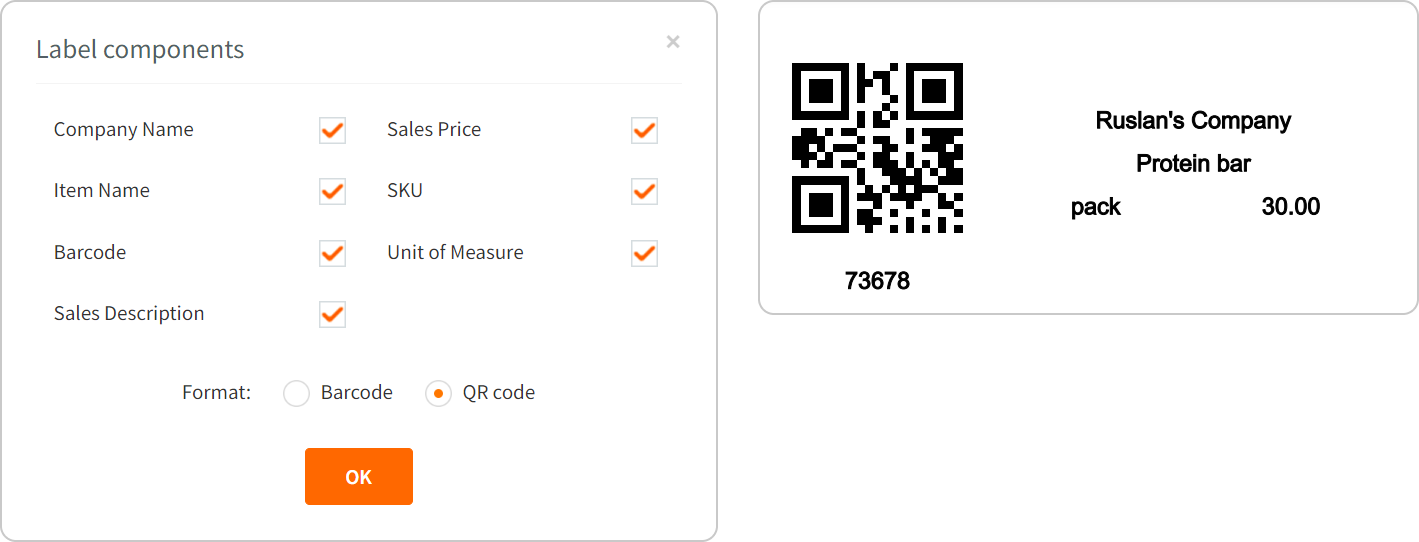
If your scanning devices are geared to read QR codes, we’ve got good news for you - HandiFox Online can print them. Go to Inventory->Barcodes, mark the items for which you’re going to print 2d barcodes, and click

. Click QR code and OK.

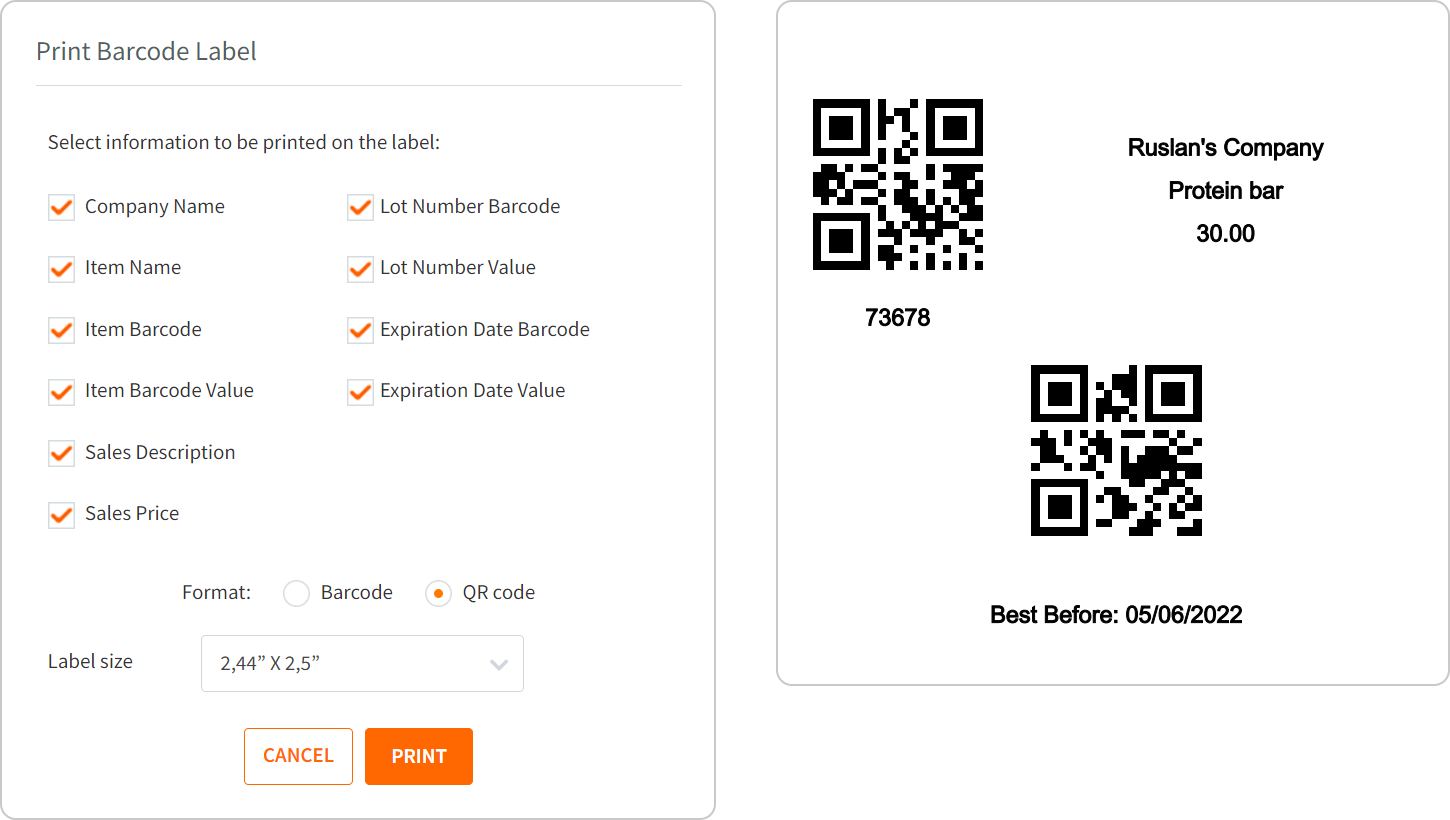
You can print QR codes for serials and lots. Go to Inventory->Serial/Lot numbers, pick an item, mark a lot or serial, and click

.

The barcode in the top left corner belongs to the item while the one below - to the lot/serial.
Creating a PO from a SO
As soon as you’ve recorded a customer’s order through a SO, you can go ahead and create a PO to replenish exactly the quantity you’ve just promised for sale. This can be done in just a couple of clicks. In the preview of the said SO, you will see the new Create PO button.

After clicking on it, you’ll be asked to confirm the quantity to replenish (you can increase it at this step) and the Vendor you’re buying this from.

Once you’ve clicked Create X POs, one or multiple POs are created and linked to the corresponding SO. You can check it out if you go to Sales Transactions and click on the transaction number in the Lnk Txn column against this SO.

An improved way of assigning numbers to transactions
There’s been a change to the way numbers get assigned to transactions. Before this update, a transaction would get a number automatically upon creation, way before you’ve filled it out and saved. If someone were to save a transaction of the same type on another device at the same time, this could lead to having two transactions with the same number. It could also occasionally cause duplicate numbers in HandiFox and QuickBooks.
From now on, you can either manually set the transaction number by filling out the respective field or let the system generate one after saving the transaction (by leaving <autoset> unchanged).

Once you’ve clicked Save, HandiFox will check this number against all others to make sure it hasn’t been reserved.
If you aren’t happy with the number your transaction got, you can always go back and edit it.
Batch-printing of sales transactions
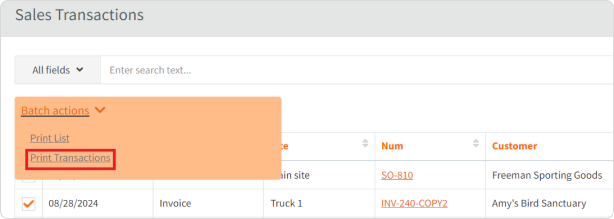
To print the hard copies of your sales transactions, go to Sales -> Sales Transactions, use the filters or find them on the list, mark them, hover to Batch actions, and click Print Transactions.

Exporting Sales transactions with linked transactions
The ability to export all sales transactions as an XLS. or CSV. file has undergone a small improvement - the report is now more complete with the linked transactions’ data in it.

Extended number of rows per page in Vendors and Customers
Now you can see up to 1000 Vendors or Customers on one page by setting up the number of rows down below.

The software makes sure to remember this number even after you’ve left the page.
Better search in the Purchases reports
The Purchases by Product/Service Detail report has been extended by the new Site column. For quicker search, we’ve added the corresponding filter - Site.
The Purchases byProduct/ServiceSummary report has two new columns now - Low cost and Max cost. Besides, you can use the Item and Site filters to narrow down the search. If you click on the item name, you’ll be redirected to the Purchases byProduct/Service Detail report that will have already filtered itself by the selected item, time range, and inventory site you picked.

Enhanced syncing of purchase transactions with QuickBooks Online
QuickBooks Online has the Customer field on POs whilst HandiFox Online doesn’t. This caused an occasional failure to keep the customer info intact in QuickBooks’ POs after pushing them back and forth between the two systems. The synchronization process has been tweaked to make sure this problem is gone.
If you aren’t using automated inventory management software yet, it’s high time you did - take a free 14-day trial of HandiFox Online.


.svg)


